
4 Kitchen Design Details That Make a Big Impact
If you’re planning a kitchen renovation, building a new home, or simply gathering inspiration for the future, the smallest details often make the biggest difference. Thoughtful design choices can elevate your kitchen from “nice” to truly custom — without always adding major cost. Here are five designer-approved kitchen ideas to consider as you plan your space.

If you’re planning a kitchen renovation, building a new home, or simply gathering inspiration for the future, the smallest details often make the biggest difference. Thoughtful design choices can elevate your kitchen from “nice” to truly custom — without always adding major cost. Here are five designer-approved kitchen ideas to consider as you plan your space.

1. Add a Small Scullery or Working Kitchen
Even the smallest scullery can transform how your kitchen functions. This extra space is perfect for a second dishwasher, sink, and additional storage — ideal for keeping the main kitchen clean during busy weeknights or gatherings. It’s also the perfect spot for a small refrigerator, coffee maker, microwave, and other appliances you’d rather not keep on display. Think of it as your behind-the-scenes powerhouse.


2. Carry Your Countertop Up the Wall
Continuing your countertop material as the backsplash creates a seamless, elevated look that works beautifully in both traditional and modern kitchens. This uninterrupted line of stone or quartz draws the eye upward and adds subtle drama. It’s especially impactful behind the range, where you can frame the area with a custom detail or unique stone veining.


3. Choose Ogee Edges for a Timeless Touch
Countertop edges are often overlooked, but they can change the entire feel of your kitchen. An ogee edge adds softness and timeless character—and it’s often not much more expensive than a standard profile. Pro tip: If you’re working within a tighter budget, consider using the ogee edge only on the kitchen island. It still makes a statement while keeping costs in check.


4. Place a Window Over the Sink
If your layout allows, positioning the sink under a window brings instant charm. A window that cranks open feels classic and practical, inviting fresh air in while you prep meals or wash dishes. And if it faces your backyard or garden — even better. It turns an everyday task into an enjoyable moment.


SHOP KITCHENS


A Southern Classic Reimagined: Dallas Home Transformation by Boulevard Interiors
This Dallas project is a perfect example of how southern architecture paired with thoughtful design can create a home that feels both rooted in tradition and alive with modern energy. Stephanie and her team at Boulevard Interiors made this house a place you can’t help but want to call home.
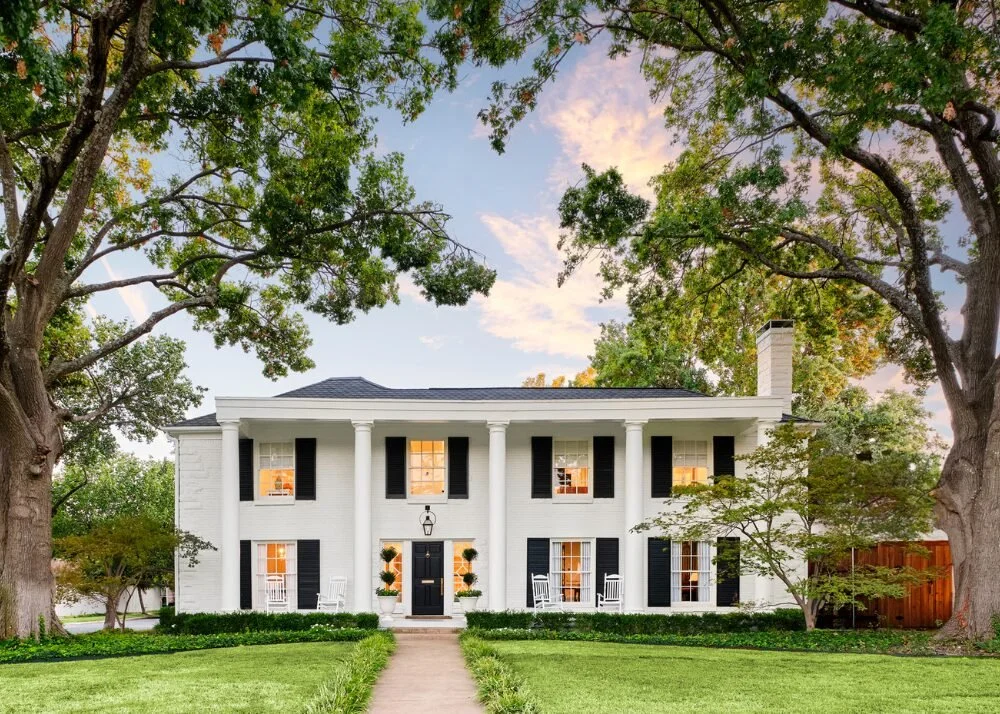

On a leafy corner lot in Dallas, TX, stands a quintessential southern white home with stately columns and undeniable curb appeal. While its exterior carried timeless charm, the interiors were in need of a fresh perspective. Enter Boulevard Interiors—led by Stephanie Ciccone with offices in Dallas and New York City—who brought both architectural expertise and design creativity to this complete renovation project. We’ve included some images of the before so you can truly appreciate the work that went into the transformation.
Design Insights: The exterior brick paint color is Benjamin Moore OC-45 Swiss Coffee and the shutters and front door are painted Sherwin Williams 6994 Greenblack.

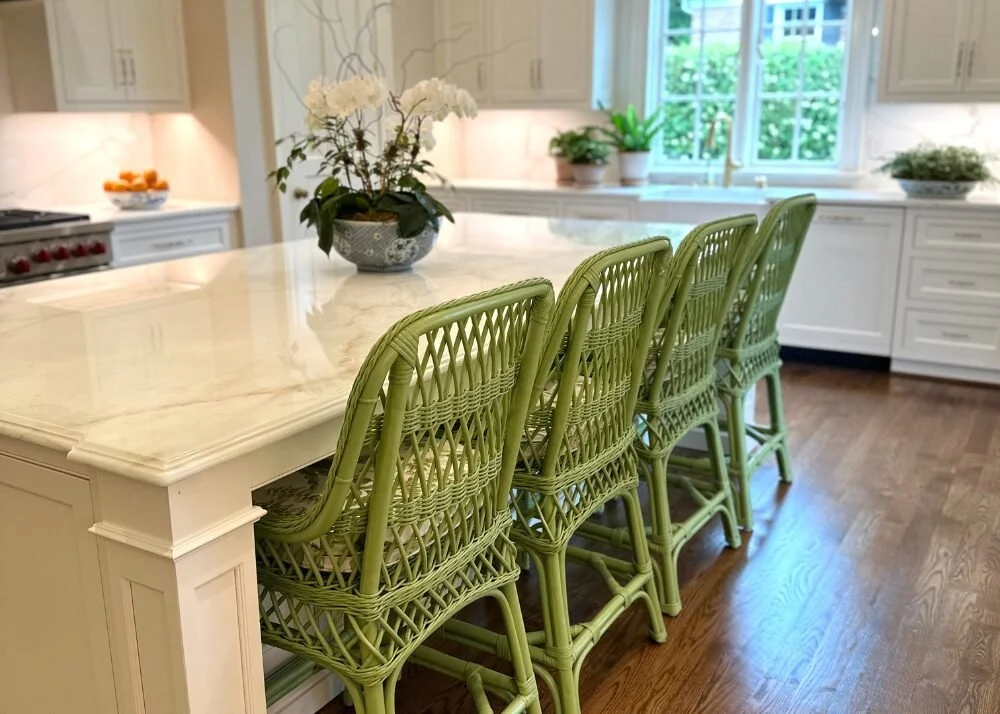
Design Insights: The kitchen cabinetry, trim and doors are painted Benjamin Moore CW-480 Bassett Hall Green.


The beauty of this transformation lies in its restraint. Without moving too many walls, the designer reimagined the flow and function of the home, thoughtfully layering in custom cabinetry, a fresh kitchen layout, and tailored design choices that honor the home's classic roots while infusing it with modern personality. Serving as both architect and designer, Boulevard Interiors managed every detail, from construction oversight to final styling.

Design Insights: The powder bath wallpaper is Schumacher Lotus Garden.


Design Insights: The formal living room walls, trim and doors are painted Benjamin Moore Alaskan Husky 1479 in High Gloss.


Design Insights: The study walls, trim, bookcases and doors are painted Benjamin Moore HC-155 Newburyport Blue.
Inside, color takes center stage. The once-traditional spaces now feel vibrant, youthful, and deeply comfortable—perfect for a young family who wanted a home that felt both elevated and livable. The sage green kitchen cabinetry brings warmth and charm, while the spa-like bathroom layers soft hues with polished finishes, creating a serene retreat. Throughout, the designer's keen eye for scale and balance ensures that each room feels cohesive, welcoming, and filled with character.


Design Insights: The laundry room cabinets, trim and doors are painted Sherwin Williams 6522 Sporty Blue.


This project is a perfect example of how southern architecture paired with thoughtful design can create a home that feels both rooted in tradition and alive with modern energy. Stephanie and her team at Boulevard Interiors made this house a place you can’t help but want to call home.
All images are provided by Stephanie Ciccone of Boulevard Interiors and captured by Nathan Schroder Photography.
DALLAS-INSPIRED HOME DECOR


Boulevard Interiors is part of a distinguished group of interior designers across the country on the Garden & Grace Directory. For more on them and other designers in your area, visit the Garden & Grace Directory here.

Transforming My Primary Bathroom: A Timeless Renovation
Renovating my primary bathroom was an exciting and transformative project. The space was outdated and poorly ventilated, so we decided to take it down to the studs and start fresh. Here’s how we turned it into a timeless retreat.

Renovating my primary bathroom was an exciting and transformative project. The space was outdated and poorly ventilated, so we decided to take it down to the studs and start fresh. Here’s how we turned it into a timeless retreat.
The Before
Before the renovation, the bathroom was dark and outdated. There was only one sink awkwardly positioned by the window, which made the layout feel unbalanced. The shower was cramped and poorly lit, with grout that hadn’t been maintained over the years. Additionally, the washer and dryer were located in the bathroom, taking up valuable space and contributing to the overall lack of functionality. To address this, we moved the laundry appliances to a newly created laundry room in the upstairs hallway, freeing up the bathroom for a more efficient layout.


Expanding the Space
The first major decision was to move a wall back 15 inches into the adjacent room. During the process, we discovered that the floor joists were sagging, so we ended up replacing them entirely. This required removing the ceiling in the foyer beneath the bathroom. Once the joists were replaced, we had the ceiling drywall redone and repainted, ensuring everything looked seamless.
This small adjustment made a huge difference, giving us enough room to add a water closet for the toilet and a double vanity. With the new layout in place, the design could truly shine.


Timeless Design Choices
I wanted a bathroom that would feel classic and elegant for years to come. Here are the design elements that brought that vision to life:
-
Marble Everywhere: Marble countertops, floors, and shower tiles created a cohesive and luxurious look.
-
Ogee Edges: The ogee edges on the countertops added a touch of sophistication.
-
Molding Details: Crown molding and pencil molding enhanced the architectural details, while tile molding inside the shower tied everything together.
-
Inset Cabinets: A custom vanity with inset cabinets provided a clean, tailored appearance.
-
Framed Mirror: A framed mirror complemented the overall design and added warmth.
-
Polished Nickel Fixtures: Plumbing fixtures in polished nickel by Newport Brass brought timeless elegance to the space.
-
Floor Tile Border: To elevate the marble floors, I added a border by cutting larger shower tiles into long, narrow pieces.


Choosing Quality Materials and Vendors
Sourcing high-quality materials and working with trusted vendors were key to achieving the final look:
-
Standalone Tub: Sourced from Ferguson, it became a beautiful focal point. Here's a link to mine.
-
Marble Tile: Purchased from Floor and Decor, the marble added a timeless elegance.
- Marble Countertop: Sourced from Stone Basyx and fabricated by Carolina Stone & Marble. The marble color is Shadow Storm, the same we have in our kitchen and butler's pantry.
-
Custom Vanity: Created by a Charlotte-based cabinet maker, the vanity perfectly fit our space and style.
-
Plumbing Fixtures: We chose polished nickel fixtures by Newport Brass from Majestic Bath, also available at Ferguson. Here's a link to the collection I used.
-
Paint: Walls painted with Benjamin Moore paint, purchased locally from Blackhawk Ace Hardware in Charlotte.


The Timeline
From start to finish, the renovation took about two months.
Tip! Select your plumbing fixtures, including the bathtub, prior to starting construction as some may have a longer lead time. After looking at shower and floor tile at many of the local tile shops, I ended up getting mine at Floor & Decor for two reasons: it was in stock, and I could hand-select the marble pieces for the shower and floor. Since marble is a natural stone, there's a lot of variation even within the same style and I didn't want to take the risk. I LOVE how it turned out. The color is Carrara Chateau. The only pieces that required a special order were the base molding which took about 5-7 days to arrive.
For the countertop, the vanity must be installed before they can template and fabricate (i.e., cut) the countertop. It's typically 1 week for them to come out and measure and another week, on average, for it to be fabricated and installed.
Despite the challenges of completely gutting the space and coordinating with various contractors, the timeline was well worth it for the result.


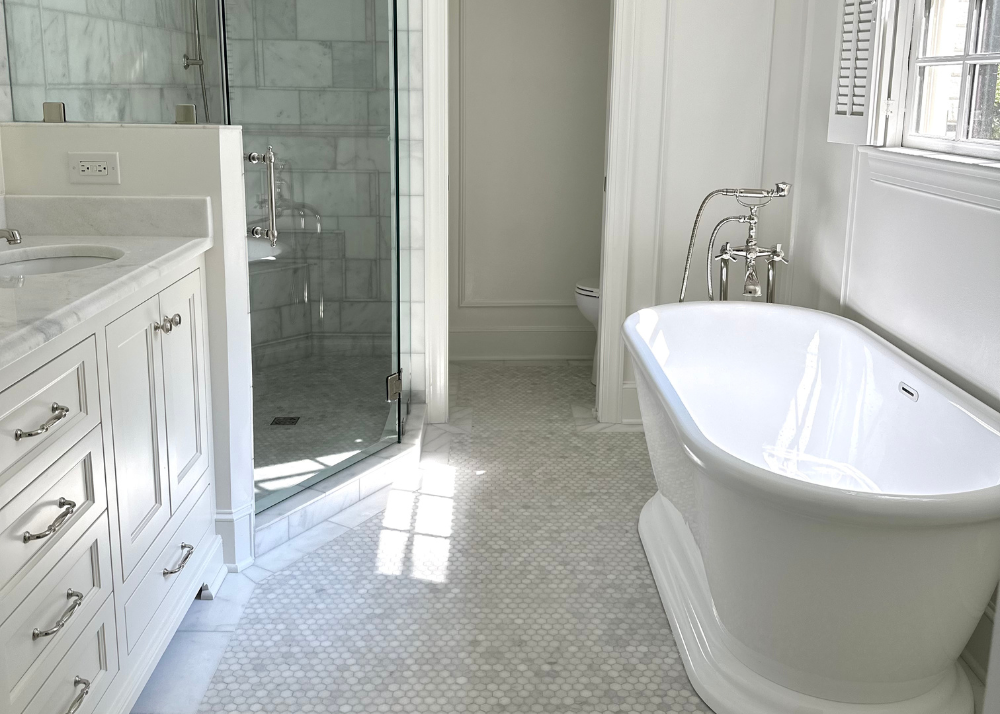
The Final Result
The newly renovated bathroom feels spacious, bright, and timeless. Every design element and material was carefully chosen to create a harmonious and elegant retreat that we’ll enjoy for years to come. This renovation taught me that thoughtful design and quality craftsmanship make all the difference.
If you’re planning a bathroom renovation, I hope this walk-through inspires you to create a space that’s both functional and timeless!